
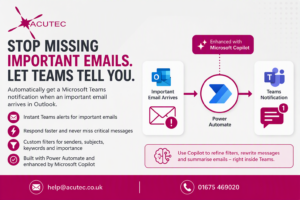

How to Automatically Send A Teams Message, When an important Email Arrives (Using Microsoft Copilot)

Modern businesses move fast — and missing a critical email can mean missed revenue, delayed projects, or unhappy customers. With Microsoft Copilot and Power Automate, you can create a simple automation that instantly sends you a Teams notification whenever an important email hits your inbox.

Below is a complete, beginner‑friendly guide.

Why This Automation Matters ?

Email is still the backbone of business communication, but it’s also easy to overlook messages when you’re jumping between Outlook, Teams, and mobile notifications.

This automation solves that by:

  • Highlighting urgent or high‑value emails

  • Notifying you instantly inside Teams

  • Reducing inbox checking

  • Keeping your workflow inside one app

It’s perfect for directors, managers, MSPs, sales teams, and anyone who needs to respond quickly.

Step‑by‑Step Guide: Create a “Important Email → Teams Message” Automation

Below is the full procedural guide rendered using the correct template.


01 – Open Power Automate

Power Automate is the engine behind Outlook and Teams automation.

Go to https://make.powerautomate.com and sign in with your Microsoft 365 account.

  • Ensure you’re using the same account as Outlook and Teams

  • Select Create from the left-hand menu


02 – Create a New Automated Flow

Automated flows trigger when something happens — in this case, receiving an important email.

Click Create → Automated cloud flow

  • Name your flow: Important Email → Teams Alert

  • Choose the trigger: When a new email arrives (V3)


03 – Define What Counts as an Important Email

Most Common Step

You can filter emails by sender, subject, keywords, or importance level.

  • In the trigger settings, expand Advanced options

  • Set filters such as:

    • From: specific email address

    • Subject Filter: e.g., “Urgent”, “Invoice”, “Client Request”

    • Importance: High

  • This ensures Teams only notifies you for meaningful messages


04 – Add the Teams Notification Action

This step sends the Teams message when the email arrives.

Click New step → Microsoft Teams → Post a message in a chat or channel

  • Choose Chat or Channel

  • Select the recipient (yourself or a team)

  • Write the message template, e.g.:

    • “You’ve received an important email from @{triggerOutputs()?[‘body/from’]} with subject @{triggerOutputs()?[‘body/subject’]}”


05 – Test the Automation

Testing ensures your flow triggers correctly and sends the Teams message.

Click Test → Manually → Send yourself an email matching the filter

  • Check Teams for the notification

  • Adjust filters if the flow didn’t trigger

  • Review the run history for errors


06 – Enable and Save the Flow

Final Step

Once saved, the automation runs continuously in the background.

  • Click Save

  • Ensure the flow status is On

  • You’ll now receive Teams alerts for every important email

Optional: Enhance the Automation with Copilot

Copilot can make this workflow even smarter:

1. Ask Copilot to refine your email filters
Example:

“Copilot, show me the best keywords to detect urgent client messages in Outlook.”

2. Ask Copilot to rewrite the Teams alert message
Example:

“Rewrite this Teams notification to sound more professional and concise.”

3. Ask Copilot to summarise the email inside the Teams message
Copilot can generate a short summary so you know the context instantly.

Enjoying this article?

Get an alert every time we post. The latest tech insights, straight to your inbox.