For many, the number of meetings we have seems to have increased significantly over the last few months. And some will feel as though much of their time is taken up by Teams and other online meetings. Finding space in your calendar for appointments isn’t always as easy as you’d like it to be.
That’s where Microsoft Bookings can help. You can avoid the hassle and constant back-and-forth of trying to arrange appointments with colleagues, clients and suppliers. Find out how you can benefit from and how to use Microsoft Bookings.
What is Microsoft Bookings?
Microsoft Bookings allows people to schedule appointments with you, at a time that suits you. As a Microsoft 365 tool, it is linked to your Outlook calendar, so it only offers appointments at times you are free. Trying to schedule a meeting over email can take too much time, trying to sort out a time everyone can do.
The tool is brilliant for professional services business, where customers book a time slot with a consultant.
For example, ACUTEC uses Bookings to allow prospective customers to book a meeting with a member of our Sales team. Bookings lets our prospective customers book the session themselves without having to wait for a phone call that may be missed.
Microsoft Bookings in Microsoft 365
Bookings is not a native application that you can install on your PC. It’s a Cloud based app, and you access it by signing in to your Microsoft 365 account in your web browser. You should then be able to view all the apps available to you, if you can’t see Bookings click on ‘Explore all your apps’ to find it. If you still can’t find Bookings then we would recommend checking you have the right Microsoft 365 plan or contacting your administrator.
Setting Up Microsoft Bookings
Once you open Bookings, you will need to set up your business as an account. You will be asked to provide a name.
You may find that if you just put your company name such as ‘ACUTEC’ the application may reject it stating that the name already exists in the system. You can change the name to whatever you like afterwards but be aware that it will set up the email address that alerts from.
Alerts include confirmation and reminder emails. If you put in ‘Telephone’ the email address will be the name added to your domain name, e.g. ‘telephone@yourdomainname.co.uk’. You won’t be able to change this. We recommend calling it ‘bookings’ so the email address is ‘bookings@yourdomainname.co.uk’ and then changing the name afterwards to the name of your company.
You will then need to choose the industry you work in. When you are ready click ‘Continue’.
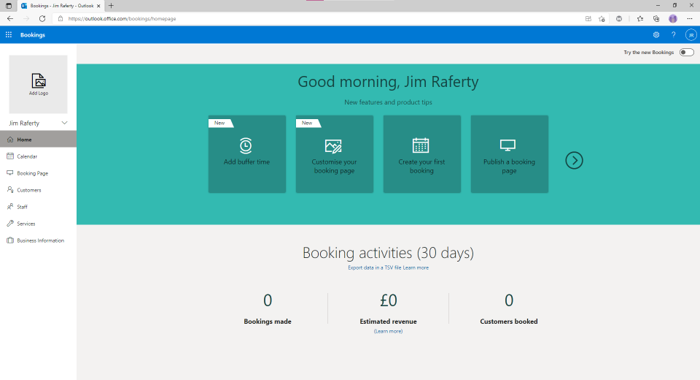
Setting up a Bookings calendar
Once you have set up your business on Bookings you will need to adjust the settings so that they are applicable to your operations. When you set up your business you will be taken to a dashboard where you can alter settings. You can see the dashboard below.
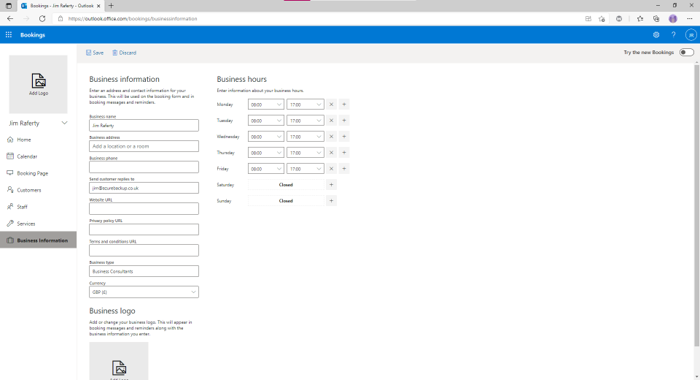
As previously mentioned, you may want to alter the name of your Bookings page to reflect your brand. To do this, click on the ‘Business Information’ tab at the bottom of the options on the left-hand side of the page. As you can see in the image below, the page is currently named ‘demo’, but it can be changed to a more appropriate name. The email address that any reminders or appointments are sent from will still be ‘demo@acutec.co.uk’ even if we change this. We’re going to name this company ‘Winston and Daniels’ for the purpose of this blog post.
In this tab you can also alter other information. You can add your business’ address, phone number, Privacy Policy and Terms and Conditions. You can also change the email address that any customer replies get sent to, you might want to set this to an email address that has an inbox viewed by multiple people, e.g. ACUTEC’s is set to hello@acutec.co.uk.
You can also upload your business’s logo in this section of the page.
Manage service settings
In the ‘Services’ tab on the left-hand side of the page you will be taken to the page where you manage the different kinds of services you offer. These could be different types of consultation – based on length or member of staff.
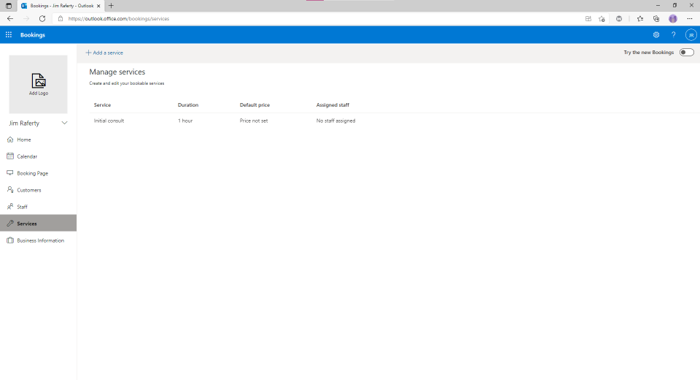
If you don’t alter this section, you will just have one option available which is an ‘Initial consult’ for 1 hour.
You can edit the services that you offer by clicking the pencil button next to each entry. You will then be given the option to change the name of the service, add a description, a location, default duration and prices. You can also set it up so that there is a ‘buffer time’ on the appointment that blocks out your calendar for a period before and after the booking. This is useful if you need to do preparation work or will have travel time.
In this section you can also add extra fields for customers when they are signing up. For example, in some situations you might need to know extra information such as how many attendees there will be or additional contact information.
Bookings also has a reminders facility. In this section you can edit the automated reminders that your customers will receive before the appointment.
On the right-hand side of the page you can assign staff to the specific service.
Bookings Service Settings
In the ‘Staff’ tab on the left-hand side of the page you can manage your staff’s time in relation to appointments. You can edit existing staff by clicking the pencil button and add staff by clicking ‘Add member of staff’.
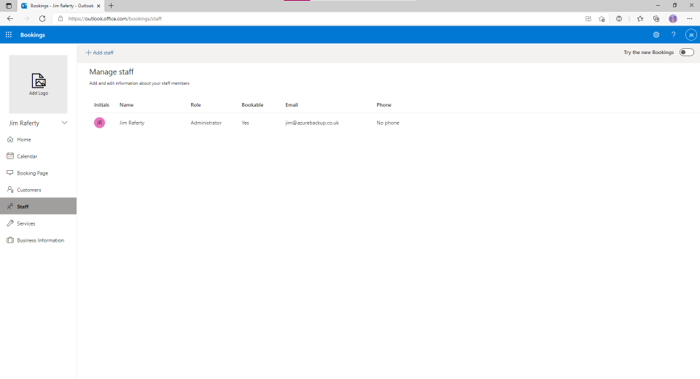
You will then be taken to a screen where you can alter settings for specific members of staff. You can choose what days and hours they are available, as well as add their email addresses and phone numbers.
Microsoft Bookings Page Settings
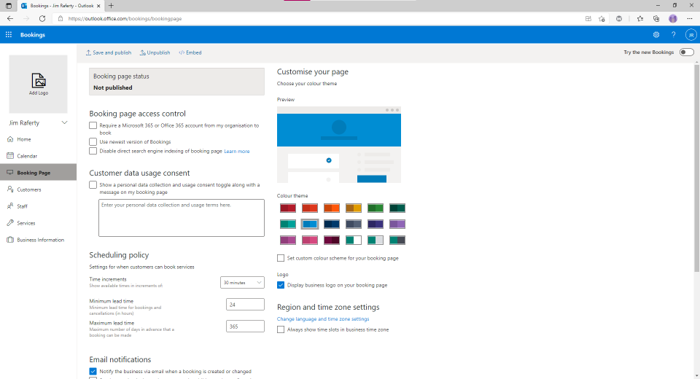
The next area of the application you will want to make changes to is in the ‘Booking page’ tab on the left-hand side of the page. Here, you can change settings about how far appointments can be made in advance and how long for.
The ‘Time increments’ setting is where you set how long appointments can be. You may only want meetings to be 30 minutes or you may want them to be 3 hours.
The ‘minimum lead time’ option allows you to stipulate how much notice you need for an appointment. You set this in hours, so you may say you want 48 hours’ notice for an appointment on cancellation.
The ‘maximum lead time’ option is how far someone can book an appointment in advance. This is where you only let appointments be booked a month in advance, 3 months, 6 months or a year. It’s up to you. You set this option by days rather than weeks or months.
You can also set it up here so that the business is emailed when an appointment is booked. You can also set it so that customers can choose a specific member of staff to book the appointment with.
On the right-hand side of the page, you can customise the page to match your brand. You can choose a colour scheme and whether your logo is displayed.
Publishing Your Bookings page
When you’re sure you have the correct settings in place it’s time to publish the page. You do this in the ‘Bookings page’ tab. At the top of the screen there is a button that says ‘Save and publish’ by clicking this button you are making the page live and ready to take appointments.
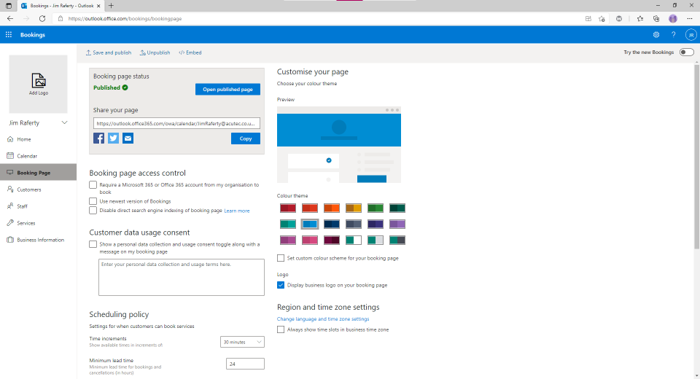
Your screen will then refresh to tell you that the page is published and provide you with a link to it. You can then direct your customers to this page either by email or on your website.
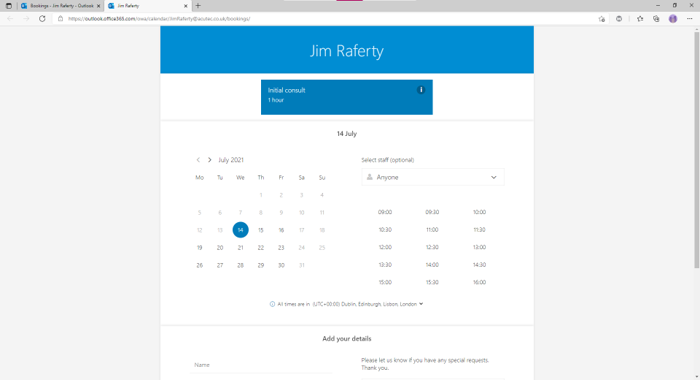
Copy and paste the link into your browser to see what your page looks like.
Microsoft Bookings is a great tool for your business to implement new ways of interacting with your customers. If you’re interested in using the application for your operations or want to know more about Microsoft 365, why not book an appointment and discuss it with one of our consultants.